Customer Service

Why Use a Cell Strainer for Reliable Sample Preparation?

Reliable sample preparation begins before the first assay. It begins with controlling what enters the tube.

Recent reports from Grand View Research and MarketsandMarkets show continued growth in cell culture, cell analysis, and laboratory filtration. These reports connect market expansion with stricter workflow consistency and higher demand for reproducible biological data. A cell strainer supports that need by removing clumps, tissue fragments, and unwanted aggregates before counting, seeding, or flow cytometry.

Small details matter.

A mesh surface can protect a suspension from visible blockage while preserving a more uniform cell distribution. In practical work, this may mean fewer clogged pipette tips, steadier hemocytometer counts, and cleaner cytometry plots. The correct pore size still matters. A 40 µm strainer will not behave like a 100 µm model, especially with dense tissue or fragile primary cells.

Cell-culture specialist Dr. R. Ian Freshney wrote, “The quality of the starting material is critical to the success of cell culture” in Culture of Animal Cells. That principle explains why sample preparation deserves more attention than it often receives.

Yet a cell strainer is not a cure-all. Excessive force can damage delicate cells, and prolonged contact may reduce recovery. Operators should compare recovery rate, viability, sterility, and clogging performance under real conditions. Manufacturer claims are useful, but they are not a substitute for validation.

A dependable workflow is built through evidence. Standardized straining, careful handling, and documented results make later experiments easier to trust.
Why Use a Cell Strainer for Reliable Sample Preparation?

What Is a Cell Strainer and How Does It Work?

A cell strainer is a porous membrane or mesh used to remove unwanted clumps from a cell suspension. It usually sits above a tube during pipetting or centrifugation. The openings may measure 40, 70, or 100 micrometres, depending on the sample. Smaller pores improve debris removal, but they can slow flow and increase cell loss. It is a simple tool. Its performance is not automatic.

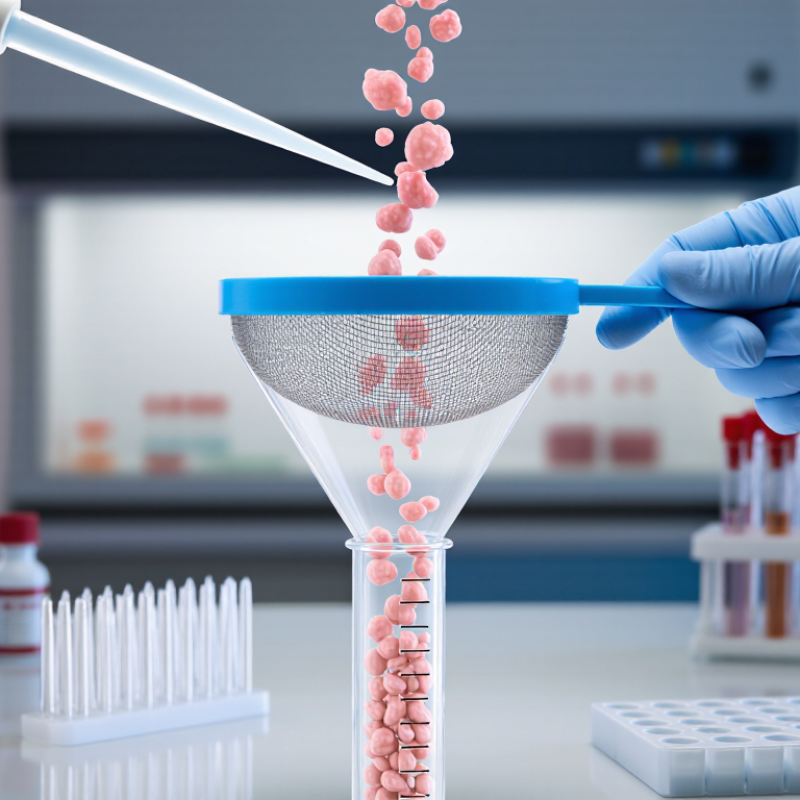
The mechanism is mainly size-based filtration. When a suspension passes through the mesh, single cells move through while aggregates, tissue fragments, and large particles remain above it. Gentle wetting can reduce cell attachment to the surface.

A 2023 review in Frontiers in Bioengineering and Biotechnology reported that filtration conditions strongly influence cell recovery and viability during primary tissue processing. Similarly, the U.S. Pharmacopeia discusses particle control and process consistency in cell-based materials under General Chapter <1046>. These sources support careful, documented handling rather than casual filtering.

In practical work, I would pre-rinse the strainer with the same culture medium used for the sample. I would also avoid forcing thick suspensions through it.

That pressure may rupture fragile cells. A 70-micrometre mesh often suits many dissociated mammalian cell preparations, but tissue type matters. Not always.

Operators should record pore size, sample volume, filtration time, and post-filtration viability. This detail helps identify hidden losses between experiments.

The choice remains a compromise: cleaner suspensions can mean fewer recovered cells. That trade-off deserves review.

When Should You Use a Cell Strainer in Sample Preparation?

A cell strainer becomes most useful when a sample contains visible clumps, tissue fragments, or unwanted debris. In routine preparation, I use one before counting cells or loading a downstream instrument. It helps create a more uniform suspension.

This matters greatly.

For tissue-derived samples, straining is often appropriate after mechanical dissociation or enzymatic treatment. The mesh can remove larger particles that might block pipette tips or interfere with analysis.

When preparing samples for flow cytometry, a strainer can improve fluid movement and reduce clumps near the detector. For microscopy, it may produce a cleaner field with fewer distracting fragments.

Choose the pore size carefully. A mesh that is too fine may trap large cells or reduce recovery.

Straining is not always necessary. Simple cultures with healthy, evenly suspended cells may need only gentle mixing. Excessive filtering can also stress fragile cells or lower the final concentration.

I once filtered a delicate preparation too aggressively and lost more material than expected. That result was a useful reminder: cleaner does not always mean better.

Check the sample visually, select the least restrictive mesh that meets the purpose, and record the choice for repeatability. A brief inspection under good lighting often reveals whether straining is genuinely needed.

How to Choose the Right Cell Strainer for Your Sample

Choosing the right cell strainer can determine whether sample preparation feels controlled or frustrating. In routine laboratory work, I have found that pore size matters most. A 40 µm strainer may support smaller cell clusters, while a 70 µm option often suits many dissociated tissue samples. Larger pores can protect fragile cells but may allow unwanted debris through.

Match the strainer to your sample, not just the protocol. Consider cell size, tissue density, expected debris, and downstream testing. Nylon mesh is commonly used for gentle filtration, while a rigid frame can improve handling during repeated transfers. For small volumes, a tube-top design may reduce sample loss. For larger suspensions, a wider surface can prevent clogging. That choice is easy to overlook. It can affect recovery.

Tips: Pre-wet the mesh with a compatible buffer to reduce cell adhesion. Pour slowly and avoid pressing dense tissue through the filter. Check the mesh after filtration; uneven flow may signal blockage. Keep the sample cool when appropriate, but follow validated handling conditions for your cells. I once assumed a finer pore size would produce a cleaner sample, yet recovery dropped noticeably. That result reminded me to compare cleanliness with cell yield, rather than choosing the smallest opening automatically. Record the pore size, sample volume, and filtration time for more reliable troubleshooting.

Step-by-Step Cell Straining Procedure for Consistent Results

A cell strainer can remove clumps, tissue fragments, and unwanted debris before analysis. Consistent filtration protects downstream measurements and improves cell counting accuracy.

Begin by selecting a pore size that suits the sample and target cell type. Inspect the strainer for damage. Place it securely over a sterile collection tube or dish. Pre-wet the mesh with a small volume of suitable buffer. This reduces sample loss during filtration. Keep the sample gently mixed, then transfer it slowly onto the center of the mesh. Do not overload the surface. Let gravity guide the suspension through the filter. Keep it gentle.

If flow slows, rinse the container with buffer and add the rinse gradually. Avoid pressing hard on the mesh, because excessive force may rupture cells or push large debris through. Collect the filtrate immediately. For sensitive samples, keep the tube chilled when appropriate and limit unnecessary waiting. In routine work, I have found that rushed transfers create more variation than the strainer itself.

After filtration, inspect the mesh and filtrate for visible blockage or remaining clumps. If a second pass is needed, use a fresh strainer with an appropriate pore size. Centrifuge the collected cells using a validated protocol, then resuspend them evenly before counting. Record pore size, buffer volume, sample amount, and processing time. These details reveal small procedural differences later. Results may still vary. That is worth reviewing.

Why Use a Cell Strainer for Reliable Sample Preparation?

Cell strainers remove aggregates and unwanted debris before counting, staining, sorting, or analysis. Selecting the pore size helps balance sample clarification with cell recovery.

Step-by-Step Cell Straining Procedure

  1. Select a sterile strainer with a pore size appropriate for the sample and target cell size.
  2. Place the strainer securely over a compatible collection tube or vessel.
  3. Pre-wet the membrane with the relevant culture medium or buffer to reduce sample loss.
  4. Apply the cell suspension gradually and avoid forcing large clumps through the membrane.
  5. Rinse the strainer with a small volume of buffer or medium to improve cell recovery.
  6. Mix the filtrate gently and proceed with counting, staining, sorting, or downstream analysis.

The chart shows commonly used nominal pore sizes. Smaller pores provide finer clarification, while larger pores generally allow faster processing and are less likely to restrict larger cells. The best choice depends on cell size, aggregate formation, and the requirements of the downstream assay.

Common Errors That Affect Cell Straining Reliability

Why Use a Cell Strainer for Reliable Sample Preparation?

Common Errors That Affect Cell Straining Reliability

A cell strainer helps remove clumps, debris, and unwanted aggregates before analysis. However, poor handling can reduce sample quality instead of improving it. Using the wrong mesh size may trap valuable cells or allow large particles through. Always match the pore size with the cell type and downstream application.

Do not rush. A dry strainer can cause uneven flow and increase cell loss. Pre-wetting the membrane with a compatible buffer usually improves passage. Excessive pressure is another frequent mistake. Pressing hard may force debris through and damage fragile cells. Gentle, steady pipetting gives more consistent results.

In routine preparation, operators sometimes use too much sample at once. This can clog the surface and create uneven filtration.

Temperature and timing also matter. Prolonged exposure outside suitable conditions may affect cell viability. Process samples promptly, especially when working with sensitive primary cells. Inspect the strainer after use. Unexpected residue can reveal clogging, poor tissue dissociation, or an unsuitable pore size. Small details matter.

Reliable preparation also depends on documentation. Record the mesh size, sample volume, buffer, and any unusual resistance during filtration. These notes make repeated experiments easier to compare. I have seen protocols followed correctly but still produce variable results because the operator changed pressure unconsciously. That limitation deserves attention. Standardized movements, gentle handling, and basic control samples can expose such hidden variation.

Translate »